Hello World with LoRaWAN, The Things Network & Arduino
Over the last couple of years LoRa has been growing in popularity and if you live near to an active gateway on The Things Network you can build cheap low power devices to send data such as sensor readings to the internet. This article describes how to send a packet of data over LoRa using an Arduino.
LoRaWAN Mini Primer
LoRa (Long Range) is a radio technology which is well suited to low power, low bandwidth, long-distance communication. It can either be used peer to peer between two LoRa radios directly connected to each other or using the LoRaWAN standard to transmit to internet-connected gateways. Communication is conducted over ISM bands and hence providing users observe duty cycle and power limits no license is required to operate LoRa devices, users must ensure they use the appropriate frequency for their region (868MHz for Europe, 915MHz for USA & Australia, 433MHz for other regions). Providing the right conditions LoRa can achieve distances into the 10s of kilometres, however, in urban environments or landscapes with hills or obstructions 2 to 5km is often more realistic.
When used in the LoRaWAN configuration packets are sent to a network via gateways. The Things Network is a free to use and community-driven network allowing users to contribute gateways to expand coverage. You may assume security is a risk if your device (node) is transmitting data to a gateway owned by another contributor. However, packets are AES encrypted from the node to the gateway and the gateway does not have access to the keys to decrypt the data, it forwards it to the network without knowledge of the payload’s contents, only the network can decrypt the traffic. Once the packet gets to the network and it is decrypted the owner of the node can view the packets received from their device via the internet, and make integrations into their own applications either via HTTP(S) callbacks or consumption via MQTT.
Due to these characteristics, LoRaWAN and The Things Network is a great platform for running Internet of Things connected sensors in locations where WiFi may not be available or where power consumption is a concern. LoRa nodes can run off of batteries for many months without requiring a charge and hence remote solar-powered, battery-backed, sensors are easily achievable. The only real limitation is the bandwidth is very low so your payload is restricted to a few bytes per message. Perfect for things like temperature and humidity sensors, air quality sensors or other sensors that send small amounts of data periodically, but not good totally not suited for use cases such as CCTV or other high bandwidth applications.
Check for Coverage
Before you get building you should check that you live in an area, or near an area, with an active The Things Network LoRaWAN gateway, without coverage you won’t be able to get a packet back to The Things Network. Anyone can expand coverage of The Things Network by hosting their own gateway however this is out of scope for this article, maybe one for the future! You can check coverage by visiting TTN Mapper.
Hardware & Software
You’ll need the following hardware and software to build a basic Arduino node.
- Arduino Nano or a compatible clone
- Draguino LoRa Shield (remember to order the right frequency for your region)
- Arduino IDE but no newer than version 1.6.13 due to library compatibility issues
- Arduino LMIC Library by Matthijs Kooijman
Setting up the hardware is fairly basic, screw the antenna onto the LoRa Shield and carefully slide the header pins of the LoRa Shield into the Arduino’s pin sockets, be careful not to bend any of the pins and ensure you line up the board correctly.
Install LMIC Library to Arduino IDE
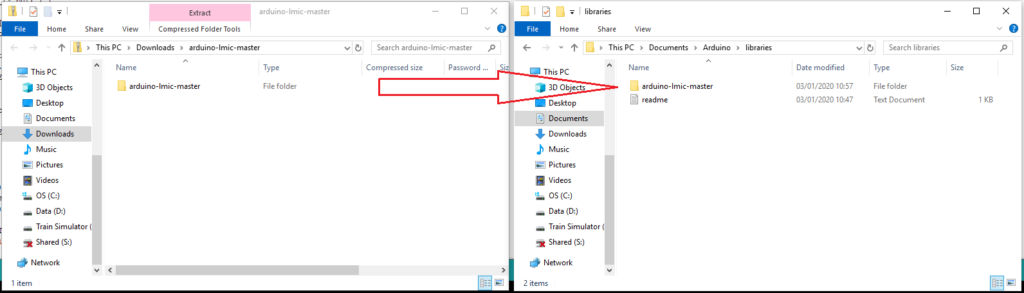
Before you open the Arduino IDE and get coding you need to install the Arduino LMIC Library, unfortunately, the library is not available in the Arduino Library Manager within the IDE. Click here to download the library as a zip file from Github and unzip it using your OS’s / your favourite compression tool, copy the arduino-lmic-master folder contained within the zip file to your Arduino folder in your documents/home directory.
Open your Arduino IDE, if you expand the Examples menu you should now see the examples associated with the library.
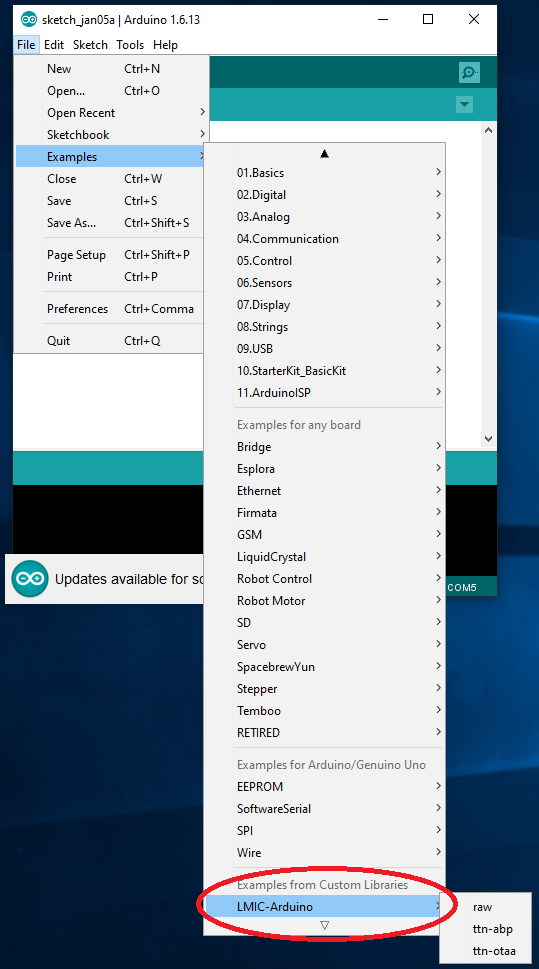
Open the ttn-abp example from the LMIC Arduino Library examples, this will be customised with our device credentials which will be obtained from The Things Network in the next step.
Configure Device in The Things Network Console
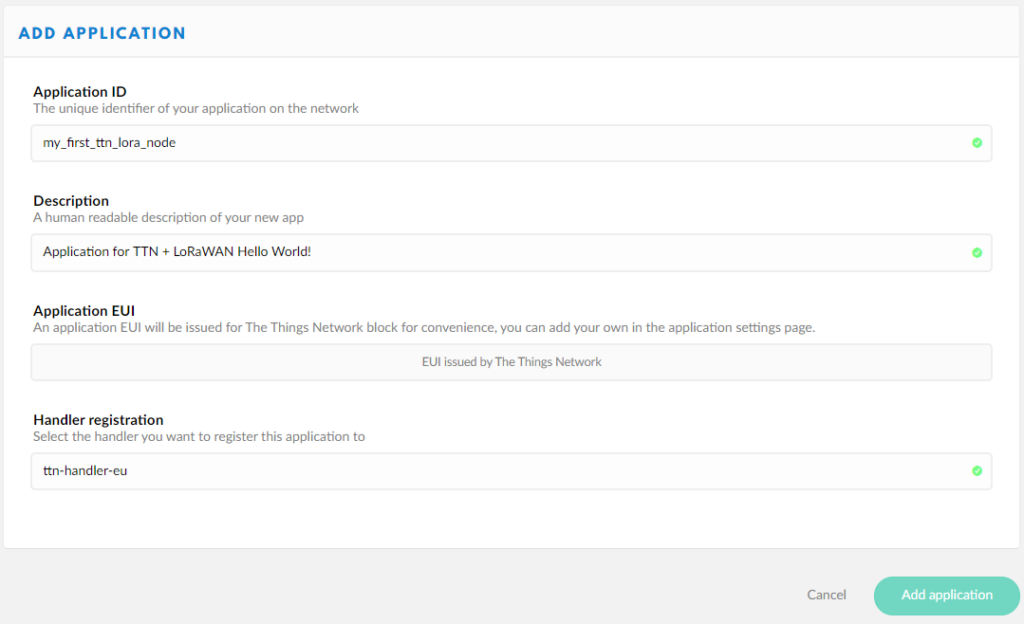
Prior to sending data from your Arduino LoRa node, you need to add the device to an application within The Things Network console. Visit The Things Network Console and log in with your account, if you do not have an account you may register a new one here. Once you are logged in select “Applications” and click the “add application” link. Complete the form and add your application.
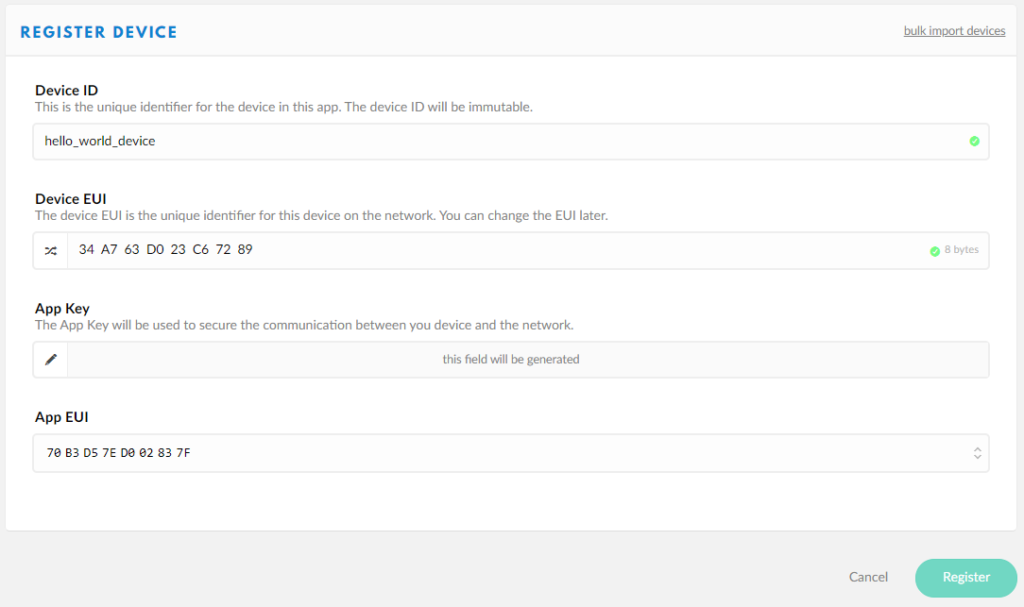
After adding your application you’ll be dropped into the application’s console page, switch to the Devices tab and then click the “register device” link. Complete the form giving the device a unique id.
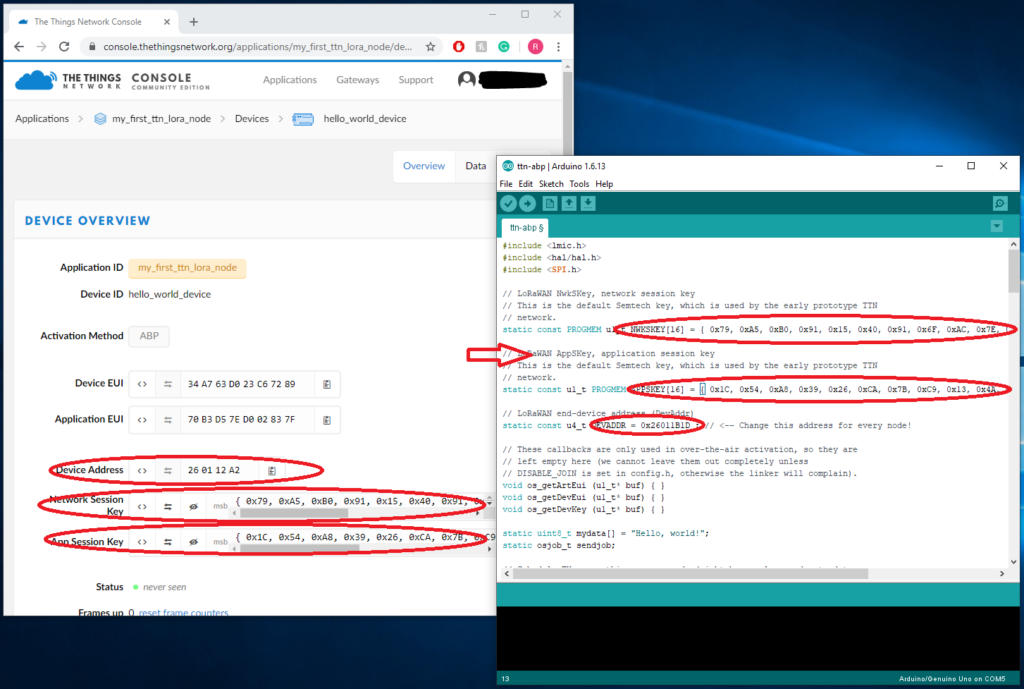
If everything is successful you should see a green success message flash and you will be provided with the device overview. Click the settings tab and switch the activation method from OTAA (Over The Air Activation) to ABP (Activation By Personalisation) then click save. The device overview should reload with various ids and keys, some will be masked out, you’ll need these in a moment to customise the example Arduino sketch.
Customising the Arduino Sketch
Copy the “Network Session Key” & “App Session Key” in MSB (Most Significant Byte) format, and the Device Address from The Things Network Console into the appropriate constant in your Arduino IDE.
Following configuration of the keys and device address from the console, you will need to update the pin mapping constant to configure the pins as appropriate for the Draguino shield. Replace lmic_pins with the following code.
// Pin mapping
const lmic_pinmap lmic_pins = {
    .nss = 10,
    .rxtx = LMIC_UNUSED_PIN,
    .rst = 5,
    .dio = {2, 6, 7},
};
Click the verify button in the toolbar and check that the compiler finds no faults with your code if all is well plug in your Arduino via USB and hit the upload button to upload the sketch to your Arduino.
Receiving Packets
Switch to the Data tab in The Things Network Console if you are in the range of a gateway and the stars and moon align correctly you should see packets of data arriving from your node.
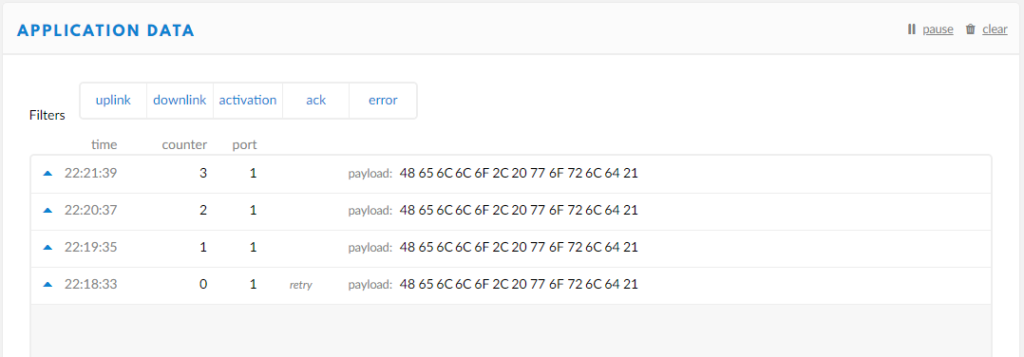
Of course, the payload doesn’t make much sense right now as it is in hexadecimal however if you copy it into a hex to ASCII converter you’ll see the packet received is, in fact, the text “Hello, world!”. At the risk of looking a bit geeky in public, you could take your node for a walk around the neighbourhood and see how far your local gateway covers by checking the application data console on your mobile phone. Obviously, in a real-world use case, you probably wouldn’t be sending the string “Hello, world!” over and over again, and you probably don’t want to view the transmitted data in the TTN console. I’ll leave it up to you to customise the sketch to send proper sensor readings and work out how to consume the data into your application via MQTT.
Leave a Reply