Helium (HNT) – Coverage Mapping
Waiting for your Helium hotspot? Not sure if you’ll get coverage? Want something to do whilst you wait? Let’s get mapping!
Disclaimer
Fiddling with crypto is generally a risky venture and your cashola is at risk. This is not financial advice and any crypto dabbling you do is entirely at your own risk. Prices and earnings correct at time of publishing but will vary with time.
What is coverage mapping?
Despite everyone being dizzy with HNT reward earnings and saving for lambos the real purpose of Helium is to build a decentralised Internet of Things (IoT) network using LoRaWAN. If you don’t know wtf this means check out my FAQ for Noobs which explains what Helium is and what an IoT network can be used for.
Of course, users of this network deploying sensors, actuators and other IoT devices need to know what area the network covers. A bit like how a mobile / cell phone user needs to be in a reception / coverage area to make phone calls, the IoT device needs to be in range of a Helium hotspot to send data over the Helium network.
The Helium Mappers website has an interactive map displaying coverage of the network, the world is split into hexagons and each hexagon is shaded based on the signal level observed at that location. Each hexagon with coverage becomes shaded when a member of the community with a device known as a mapper goes to that location and successfully sends a packet to the Helium network. Just because a hexagon is not shaded doesn’t mean there is no coverage there, it may just mean a member of the community has not mapped this location yet. However if there is no hotspot near by it is likely that it may also be true that there is no coverage in that location.
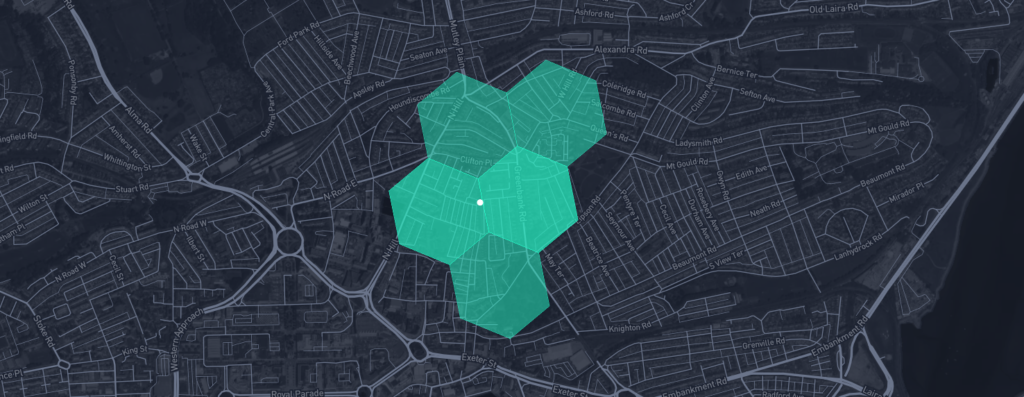
You can help complete the coverage map by building a mapper node and taking it to hexagons near hotspots which are not yet shaded to see if coverage is available in that area, by doing so you’ll help people deploying IoT devices understand where they can use the network, and hopefully in the long term encourage more data credits to be used via your hotspot earning you a larger share of that sweet sweet HNT.
What is this mapper thing?
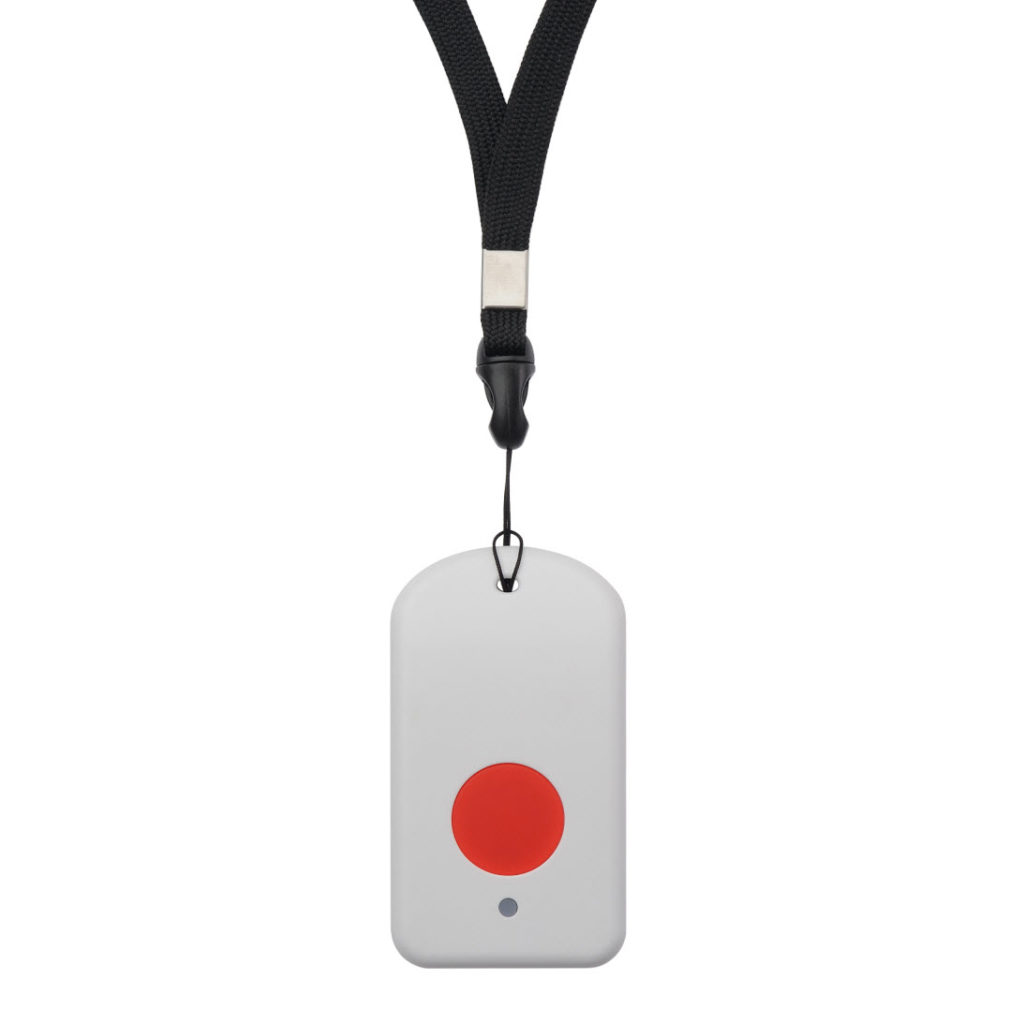
A mapper is essentially just another IoT sensor on the Helium Network, but instead of measuring environmental or other data such as temperature, air quality, rubbish level or whatever other thing you can think of sensing, it is equipped with a Global Positioning System (GPS) module and simply reports back it’s position periodically, this positioning data and also meta-data such as signal strength and hotspot ID is used to complete the map.
Buying a Mapper
Remember when buying a mapper you’ll need to order a device which matches the region you are in. For example USA / Canda US915, Europe EU868 and India IN865. If you are unsure of which Helium region you are in check on What Helium Region?

By far the cheapest mapper node you can buy is a TTGO T-Beam, this is a low cost circuit board from China which can be ordered off of the usual suspects like BangGood / AliExpress or if you prefer quicker shipping Amazon / eBay. The downside is TTGO T-Beams do not come equipped with the required software and you’ll need to flash them yourself. If you are familiar with Arduino this shouldn’t cause too many problems.
If you’d like to try out a T-Beam checkout the software on Github – https://github.com/kizniche/ttgo-tbeam-ttn-tracker
If the thought of all that code and flashing your own circuit board scares you then you are not excluded from mapping, however it may cost a little more to get started. Several commercial GPS LoRaWAN nodes are available such as the Dragino GPS Tracker. These are already preconfigured out of the box and just need you to register the keys supplied with the device on the Helium console.
Helium Console – Device Registration
Once you receive your mapper you’ll need to register it on the Helium Console. Visit https://console.helium.com and sign up for an account, the good news is currently each new account gets 10,000 data credits (DC) for free, so you don’t need to burn any precious HNT to get started on your mapping adventure!
To add your mapper select “Devices” from the left hand menu and click the “Add Device” button.
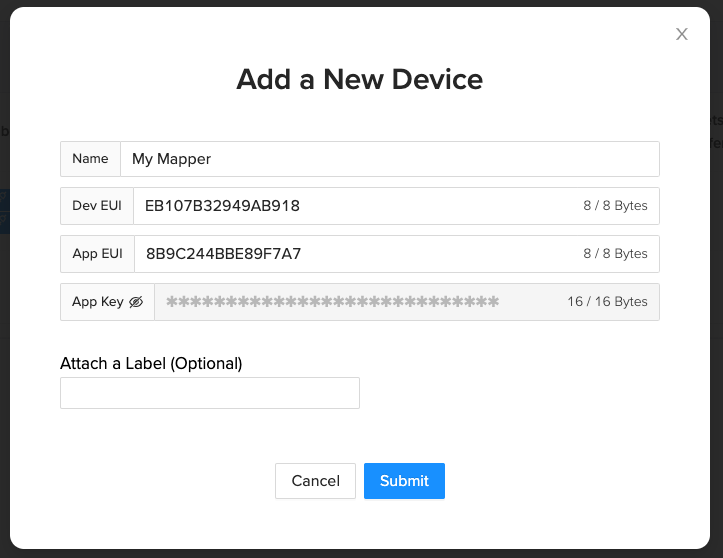
If you purchased a pre-made mapper and have been supplied with keys from the manufacturer you should remove the auto generated keys in this form and instead enter the Device EUI, App EUI and App Key from the manufacturer. If you are using a T-Beam you should accept the auto generated keys and configure them in your code within the Arduino IDE prior to flashing the device.
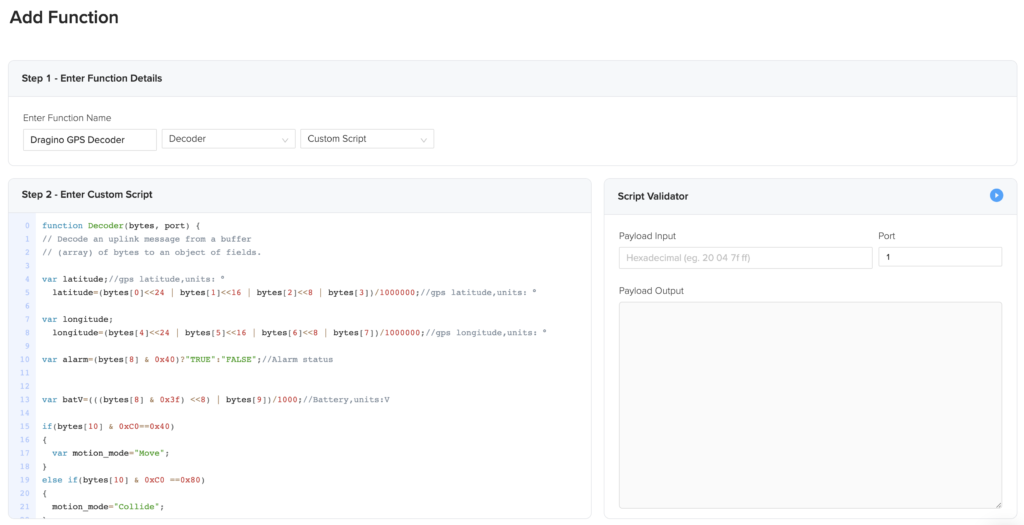
Helium Console – Decoder
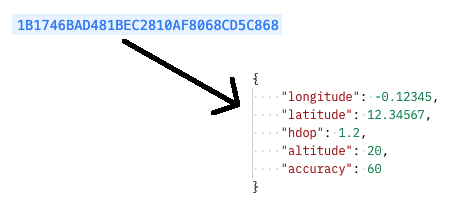
After adding your device you’ll need to configure a decoder, a decoder converts the raw bytes received by the hotspot from the mapper into a more palatable format for ingestion into the Helium Mappers API.
The decoder is written in JavaScript and is specific to the device type you are using, most commercial sensors are provided with a suitable decoder by the manufacturer, for example the decoder for the Dragino linked above is available from here. Don’t worry you don’t need to edit the decoder or even understand it, it just needs to be copied and pasted to the appropriate place in the Helium console. To configure the decoder select “Functions” from the left hand menu in the console and click the “Add Function” button. Fill out the form as per below and copy and paste the decoder function for your device into the script field. Also remember to add a label such as “Mapper-Label” the label will be used later to apply the decoder to your device.
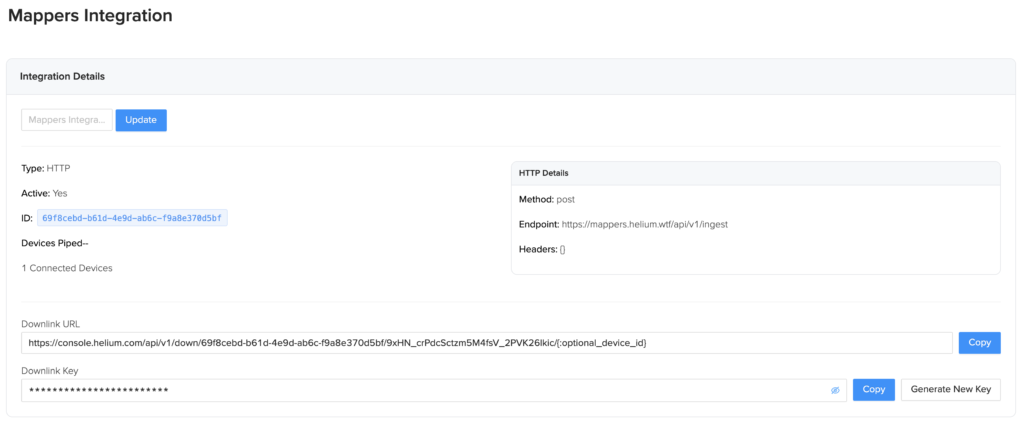
Helium Console – Integration
Finally we need to setup the integration to Helium Mappers select “Integrations” from the left hand menu and then add a HTTP Custom Integration. Set the endpoint as https://mappers.helium.wtf/api/v1/ingest and the method as POST no other fields need to be completed. After the integration has been created apply a label such as “Mapper-Label” ensuring it is the same as the label you used in the previous step with the decoder, this will be used later to apply the integration to your device.
Helium Console – Apply Device Labels
To link your decoder and integration up to your device select “Devices” from the left hand menu, select your mapper device and then click the “Add Label” button. Select the label previously configured in the decoder and integration pages from the “Choose Label” drop down. This will apply the decoder and integration to the device ready for use.
Get Mapping
Following configuration of your mapper node in the Helium Console you can now get mapping. Helium uses Over The Air Activation (OTAA), this means prior to your mapper node sending data it must join the network and exchange its keys. To do this you should go to a place with coverage and power on your mapper device, you can either go to a location already mapped todo this or just go to a location in close proximity to a hotspot.
To see if your mapper has joined you may debug it in realtime via the Helium console. Login to the Helium console, navigate to “Devices”, select your mapper node and then press the bug floating button on the right hand side. A drawer will open in the console and display any packets received from your mapper in real time, if no packets are received once you power on the mapper either the mapper node is configured incorrectly or you are not in range of a Helium hotspot.
Once you see packets flowing get walking or cycling and shade in those hexes! You may also drive however depending on the spread factor of the packet you may see mixed results above 30mph / 50km/h. You should see hexagons that you have visited and managed to reach a hotspot from get shaded within 24 hours after submitting the packet.
Need more help?
Checkout the Helium Mapping Docs.
Helpful post? Want to support me?
If you enjoyed this post and want to throw a bit of crypto at me you can tip with the following coins:
- HNT – 14SSedssDPfL7hNFzRdyizA4cFLPUyQ5xQ2Ti6iqKBwxFbvbad1
- ETH – 0xe5455bdb2d9b170c95b5742cbedf10cc0f2cb2ef
- BTC – 12TSoJ4ZbgHG6gaezpGXZ65AFAndg2QeaE
- BAT – Tip via Brave Browser tipping feature
Leave a Reply